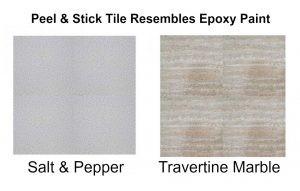
Our development of an affordable and easy-to-install peel and stick garage floor tile began with the solid black and solid white color combination for customers wishing to make a checkerboard or a checkered flag look. We added a few new patterns yet our biggest seller has remained the black and white. Recently, we introduced 2 new patterns which closely resemble epoxy paint.

Considering a new floor for your garage or basement? Many of our customer discover us online because they’re looking for a solution for their garage floor. Their epoxy-painted garage floor is chipping, flaking and it “looks like crap” (their words, almost every time). Some used a do-it-yourself epoxy paint kit and some have hired a professional. Some did the job “on the cheap” and some shelled out some big bucks. The results ended up being the same. See our garage floor tile pattern selection here.
Our new garage floor tile patterns have that epoxy paint look and even a little bit of the feel. The speckled pattern of our epoxy-look tile deliver that signature flake pattern on top of a solid background. Each tile is slightly textured and have a glossy finish. The tiles are 12″ x 12″ square and they’re super-easy to install. Just peel off the paper backing and stick them in place. All the tools you need are a tape measure, a straight edge and a razor knife (utility knife). The tiles are flexible and easy to cut. Put one tile neatly next to or in front of the next and watch how fast your new floor takes shape!
Preparing Your Cement Garage or Basement Floor for Installing Self Adhesive Vinyl Tile
Self-sticking floor tile is easy to install but in order to get best results, you want your surface to be clean, smooth and dry. It’s quite common for older floor to have oil stains or other grime which has sunk in deep. That’s okay. Empty your floor entirely and fill a bucket with warm water and a little bit of dish soap. Ideally, you will want to scrub it with a brush so instead of getting on your hands an knees, you may want to go to the hardware store and buy a deck scrub (a scrub brush mounted onto a broom handle like the one you would use on a boat).
Don’t worry about getting the floor spotless. Cement is porous so some of this grime will have sunken in too deep to be removed. As long as you run this process and get the surface moderately clean, you should be just fine. Rinse with water so you don’t end up with any soap residue. You may want to use a damp mop. Let the floor dry for several hours. As mentioned, cement is porous so you want it to dry as much as possible.
Repair cracks and holes in your floor prior to installing tile.
The tile is flexible and it will conform to the surface to which it’s applied. If you have cracks, holes or expansion joints, they will need to be filled in with floor patch or floor leveler. This comes in either a powder or a premixed (ready-to-use) form. Apply it just as you would apply spackling compound to a wall prior to painting with a putty knife and smooth it out. Allow the floor patch time to dry by following the advice on the packaging. Broom sweep the floor thoroughly to remove all dust.
Having used this tile in many areas of our warehouse and showroom, in my own garage and also having sold this very same material to hundreds (perhaps thousands of satisfied customers), I can say with confidence and enthusiasm
Signup to be the first to hear about exclusive deals, special offers and upcoming collections